Apple’s next big update, iOS 18, is on the horizon, promising exciting new features and improvements. However, upgrading to a new operating system can sometimes be daunting. You might worry about losing important data, encountering bugs, or compatibility issues with your favorite apps.
Fear not, fellow iPhone users! This guide will walk you through the process of upgrading to iOS 18 with minimal risk. We’ll also introduce Dr.Fone, a powerful tool from Wondershare that can back up your data, restore it if needed, and even repair your system in case of unexpected issues.
Table of Contents
Preparing for the Upgrade
Before diving into the upgrade process, take a moment to prepare. These steps will help ensure a smooth transition to iOS 18:
- Backup Your Data: Explain why backing up your device is crucial. Mention Dr.Fone Backup & Restore as a reliable solution for creating backups1.
- Check Device Compatibility: Provide a list of compatible devices for iOS 18.
- Free Up Storage: Advise users to clear unnecessary files to ensure a smooth upgrade process.
Why Back Up Before Upgrading to iOS 18?
While Apple’s update process is generally smooth, there’s always a chance of something unexpected happening. A backup acts as a safety net, allowing you to restore your precious data in case of any issues.
Using Dr.Fone for Backup Before Upgrading
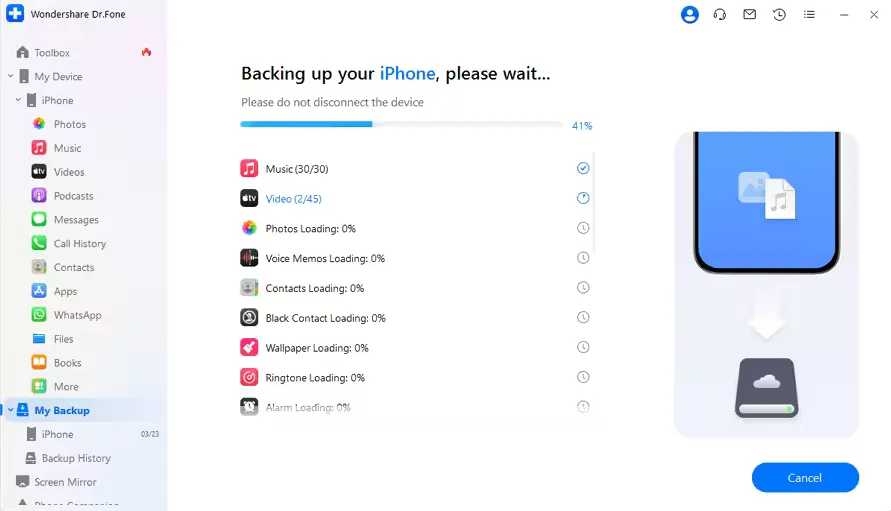
- Download and install Dr.Fone on your computer.
- Launch Dr.Fone and connect your iPhone using a USB cable.
- Select “Phone Backup” from the main menu.
- Choose the type of backup you want: “Full Backup” for everything or “Selective Backup” to choose specific data.
- Click “Back Up” to start the process. Dr.Fone will create a secure backup of your iPhone data.
Upgrading to iOS 18: A Step-by-Step Guide
Once you have a complete backup with Dr.Fone, you’re ready to upgrade! Here’s how:
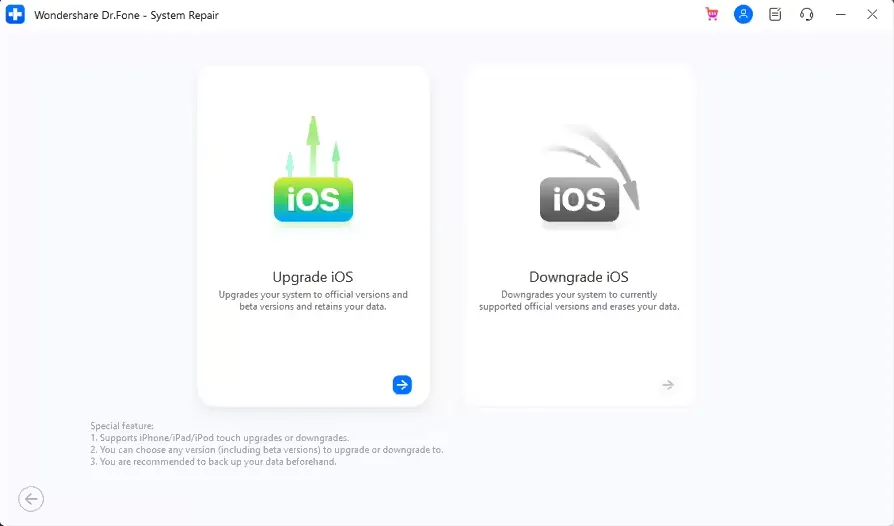
- Launch Dr.Fone, and select System Repair.
- Connect the iPhone to the computer.
- Click on iOS Upgrade/Downgrade >Upgrade iOS.
- Download the iOS version you need.
- Click Repair to install iOS 18.
Note: iOS 18 is currently in beta, indicating it is a pre-release version that may contain bugs, instability, and unpredictable behavior.
Restoring Backup with Dr.Fone if needed
If you encounter any problems after upgrading, you can easily restore your data using your Dr.Fone backup:
- Launch Dr.Fone on your computer and connect your iPhone.
- Select “Phone Backup” from the main menu.
- Click on “View Backup History” to choose the relevant backup you created before upgrading.
- Select the type of data you want to restore (all data or specific types).
- Click “Restore” to begin the process. Dr.Fone will transfer your data back to your iPhone.
Dr.Fone System Repair
In rare cases, even after a successful backup, major updates can cause unexpected system issues on your iPhone. Dr.Fone’s System Repair function can be a lifesaver in such scenarios, but it’s important to note it should only be used if you encounter problems after upgrading:
- Launch Dr.Fone on your computer and connect your iPhone.
- (Only if needed): If your iPhone is experiencing issues after the upgrade, select “System Repair” from the Dr.Fone menu.
- Dr.Fone will guide you through diagnosing and potentially repairing your iPhone’s system issues.
By following these steps and leveraging Dr.Fone’s backup and repair functionalities, you can upgrade to iOS 18 with confidence and minimal risk!
Check this also: How to Downgrade from iOS 17 to iOS 16 Without Losing Data
FAQs
Skipping the backup increases the risk of data loss. Always back up before upgrading.
Yes! Dr.Fone allows you to choose specific data to restore.
Yes, it works with iPhones, iPads, and iPod Touch devices.
Conclusion
That’s it! Upgrading to iOS 18 should be a breeze with these tips and Dr.Fone by your side. We all know that feeling of wanting to jump right in and explore a new update, but a quick backup with Dr.Fone can save you a ton of stress.
So, are you ready to dive into iOS 18? What features are catching your eye? Let us know in the comments below – we love hearing from our readers!